How Do I Upload a Document?
You can add customized account documents for your members to fill out and sign. For example, you can upload your own liability waiver and configure it to be filled out and signed by your members from their account view.
Before you begin, make sure you have your documents saved as a PDF.
Click on your home menu and select “settings”.

Select “documents” on the bottom of the left side.

Click the green “add document” button.

Type in the title of the document.
Click “choose file”.
Choose the document you want to upload from your computer.
Click the SAVE button.

You can see that your document has been uploaded.
Click the edit pencil next to the document.
From here, you can add values to the fields that need to be filled in by the member.
You can choose what values you want to add from the blue tool bar at the top of your document.
Once you choose which value you want, use your mouse to drag it and size it to the field you want filled out.

Value options:
Signature gives you the option to add a signature, full name, or initials.

Date gives you the option to add mm/dd/yyyy, month, day, or year.

Other gives you the option to add email, date of birth, phone, or custom value.

Once you have the values placed in the fields you want, click save in the blue tool bar.

You are now ready to have members sign the necessary documents!
If you need this document signed upon joining be sure to enable it in the Additional Signing Documents section in Applications.

Click Applications from your Home Menu
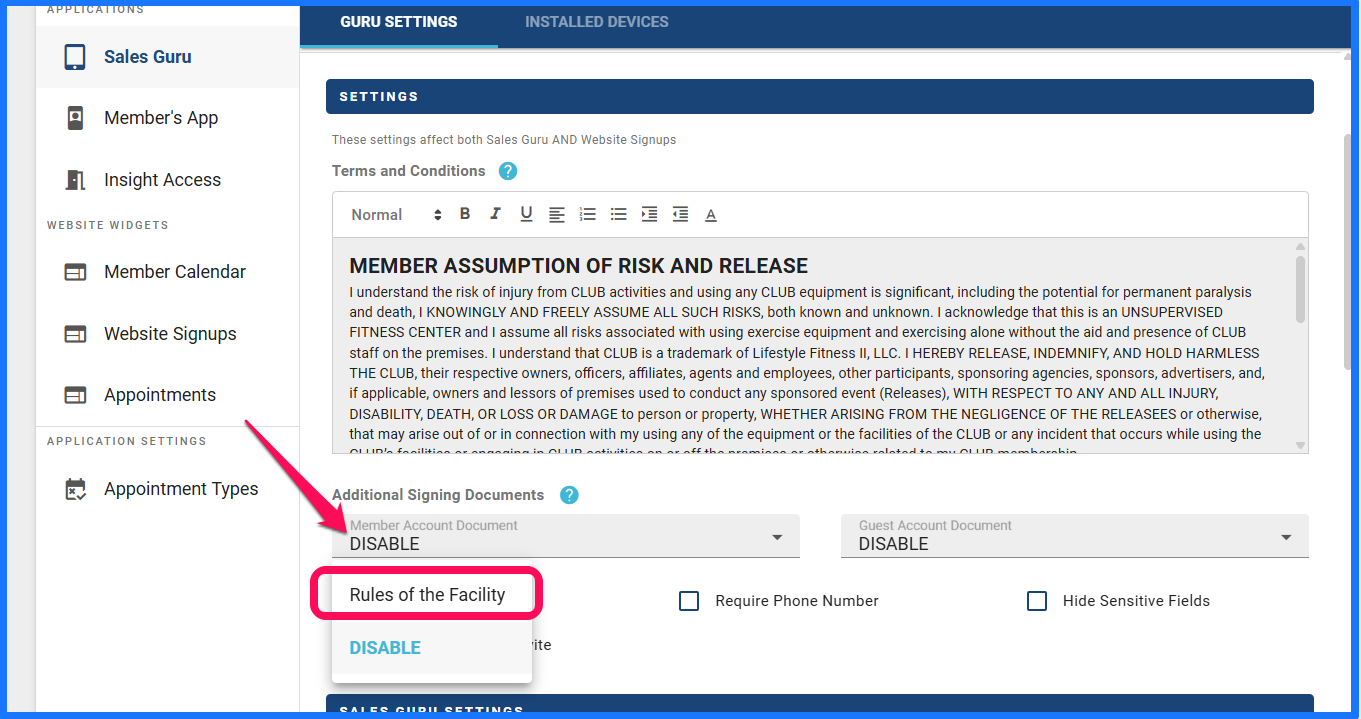
Click the Disable or drop down for Member Account Document and choose the file you would like as a required signing document.
*Even if you have done this before, if you change your document by, deleting and readding it in documents, you will need to attach it again.