Add Sale
To add a sale to a member's account for retail items, accounts fees or membership payments, follow the steps below. If you are paying a past due invoice, see this article.
- Navigate to the member's account or click add sale from your quick actions tab on your dashboard.
- Once you are on the account, click ADD SALE.
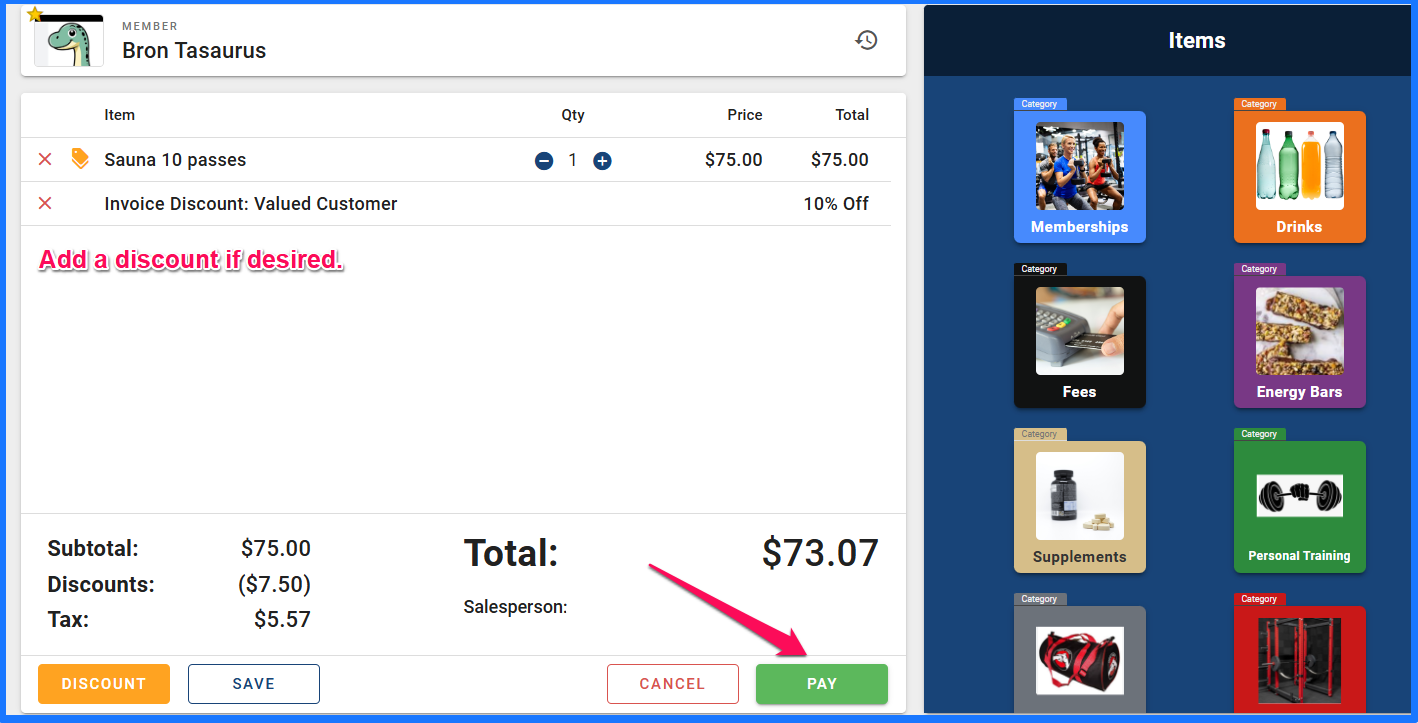
- Select the items you would like to sell and decide if you would like to add any discounts at that time. You can add a discount to the entire transaction or just one item.
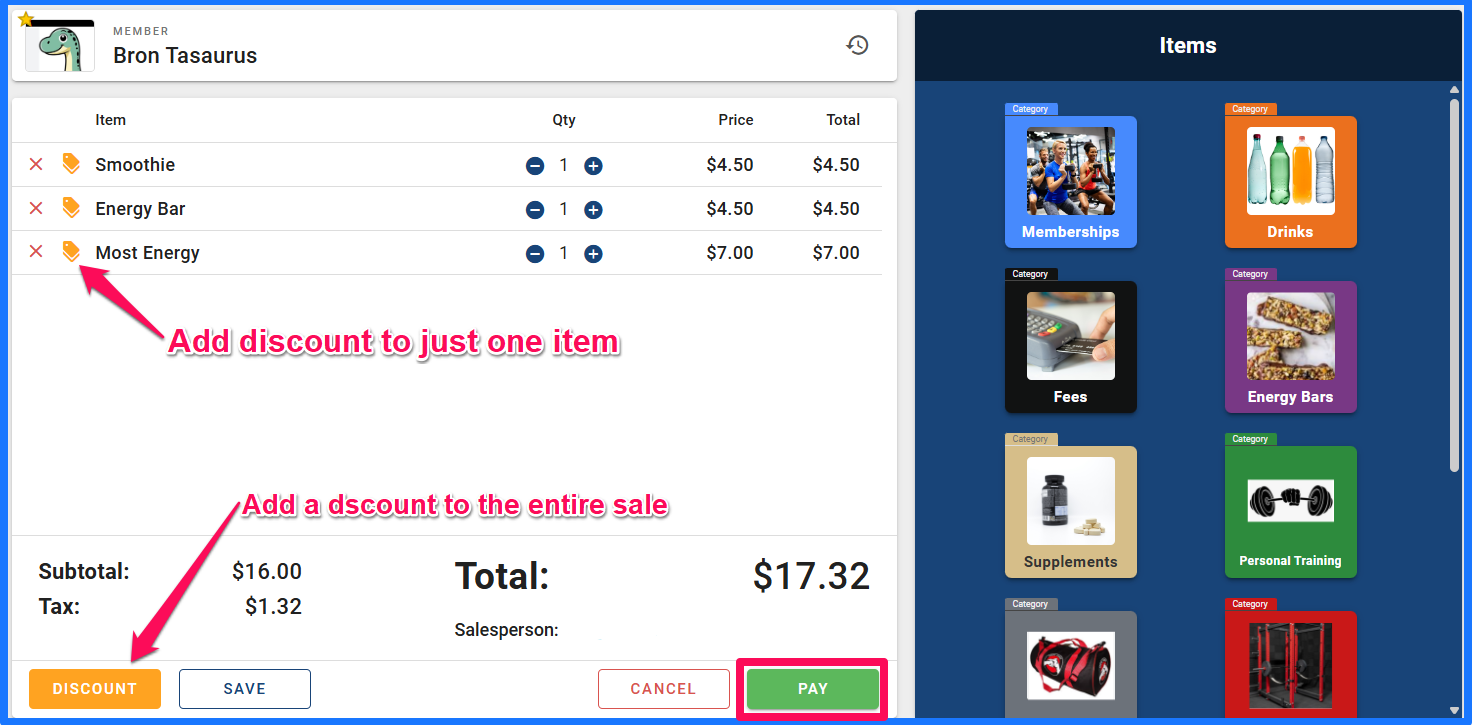
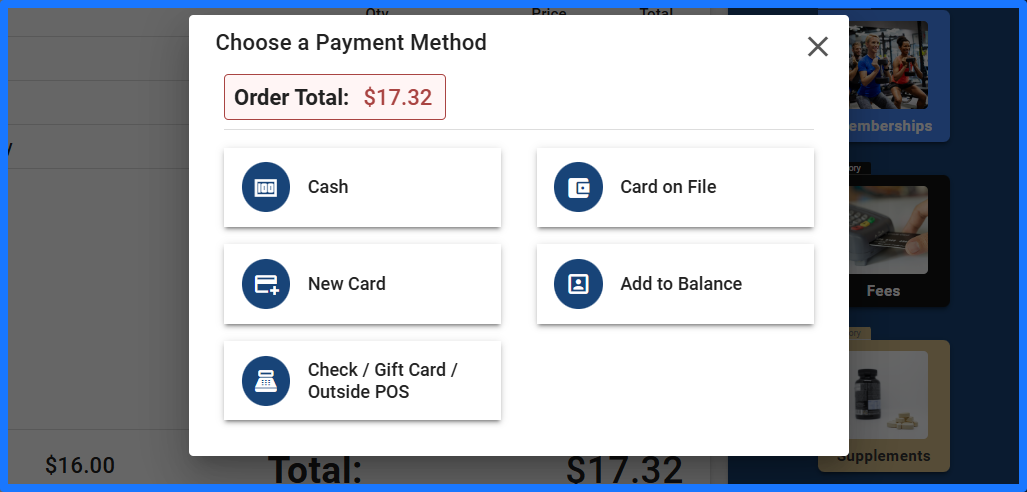
- Click Pay and select payment method - or you can save the sale for later.
-
Then click complete sale.
To perform a refund, see this article.
POS Sales - Member History and Saved Invoice
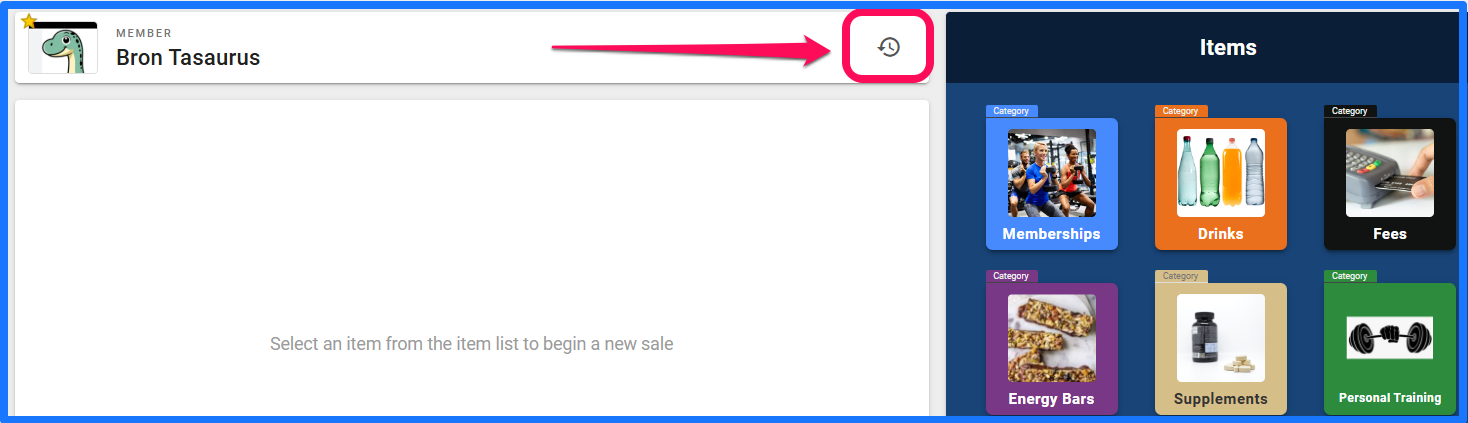
For a quick glance at the most recent sales, for quick access, click the button at the top right of your Add Sale screen and you will find a list of the last transactions.
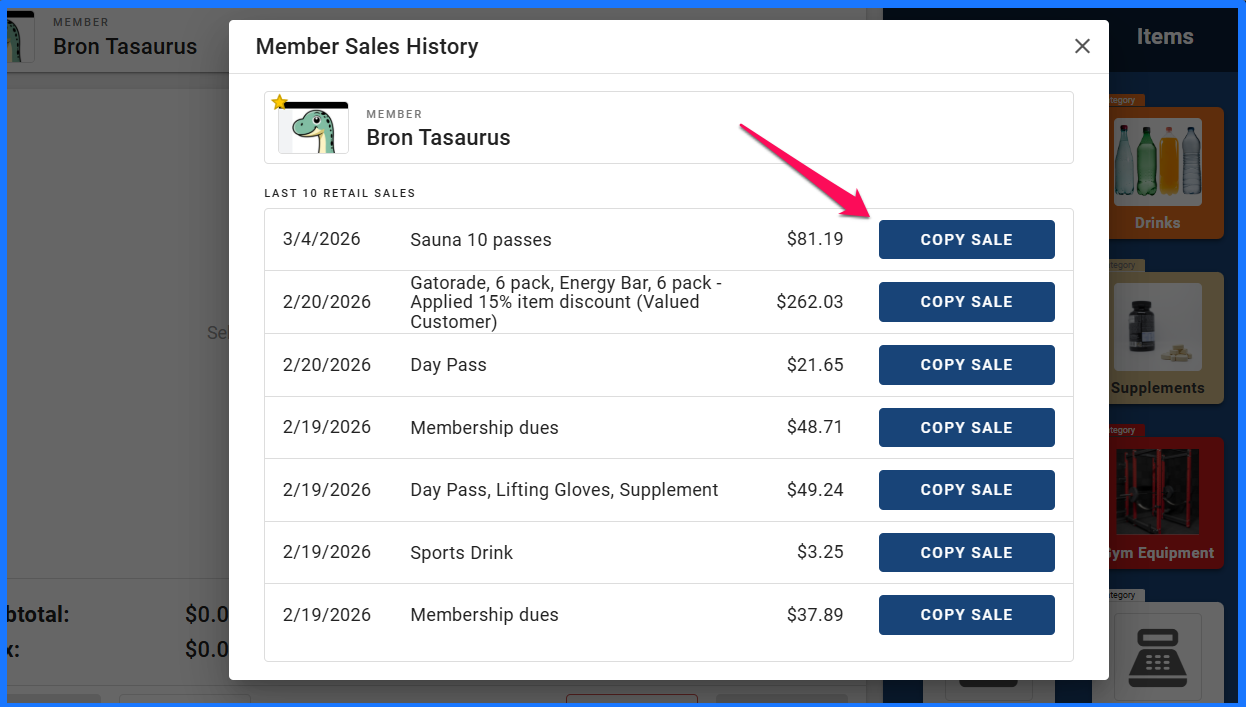
You will be able to view quickly the last 10 retail transactions and start a new sale with the same set of items, by pressing Copy Sale.
On the bottom of the Sales screen, a "Save" button is present if you need to suspend a sale that will be resumed. If selected, a pop up window will appear asking if you are sure you wish to save for later.
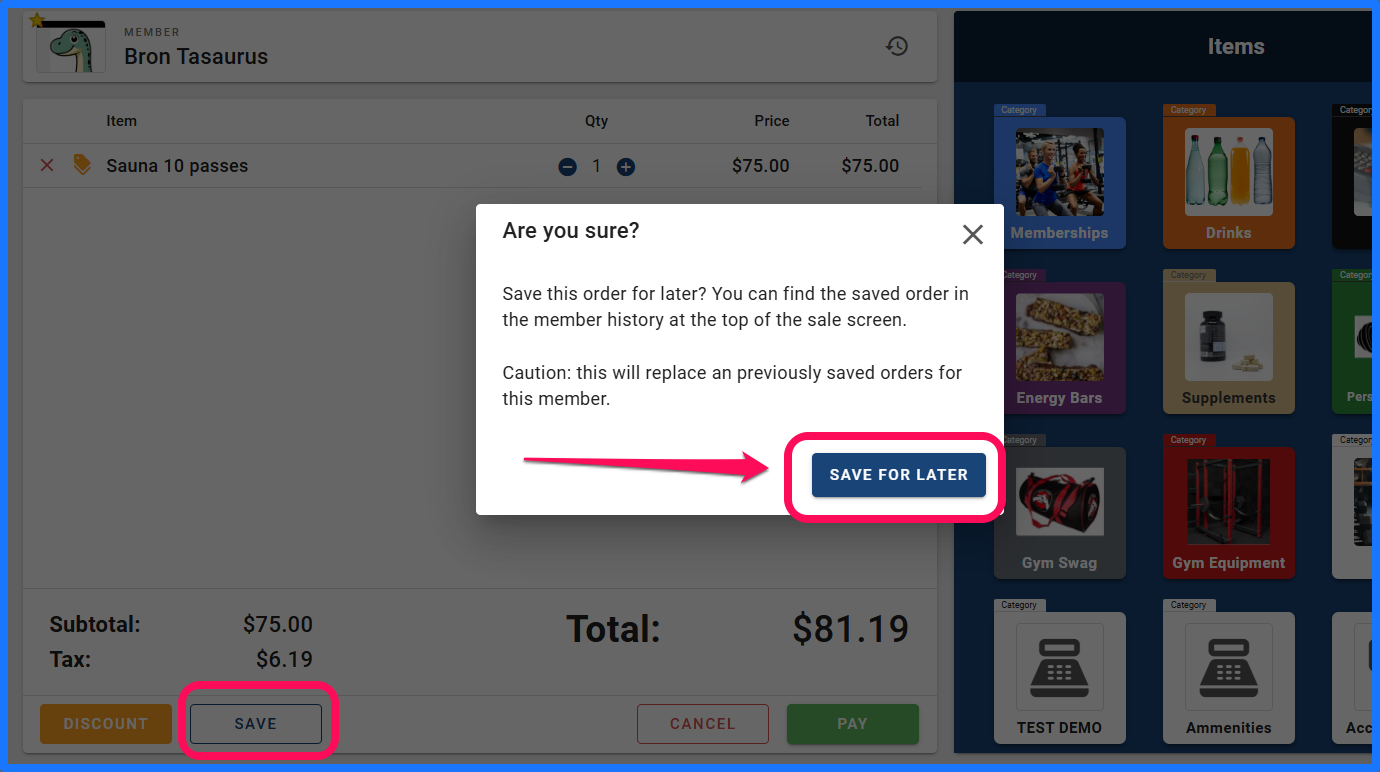
To pick up this sale after it is saved, pull up member in question, click add sale and again, click historical button inside of POS. The saved sale will be present under the Saved Invoice. Now you can choose Finish or Delete.

The sale will resume with all items that were saved present, you may add or remove items before completing sale.
- Any items that are no longer available to sell will not be included when loaded up
- If the original sale had discounts, those are not re-applied, only the items are added, so discounts need to be added again, if desired.
- Only one saved invoice per account, so if you save another one, it replaces the previous one. It's meant to be a short term way to save one partial sale to finish later.
If you are still using the line item transaction system or have not yet converted to the current Point Of Sale Invoicing system, follow the steps below.
Any time you need to add a sale to a member's account, click on the Add Sale button at the bottom of their Account Statement box.

Choose how you would like to collect this payment.
- The customer already paid
- Charge the credit card or ACH on file
- Charge a new credit card or ACH account
- Add to Balance (to be charged at next auto-billing)
Under “Payment For"
- Click the drop-down menu and select the applicable item.
If the item is pre-defined, the system will auto populate the price and description.
- If you choose an option like "retail sale," you will need to manually enter the price for the item.
- You can then edit, or add to, the description as well.

Click Save (if the customer already paid or you are adding to balance), or Charge Account (if you are charging the payment method on file).
If charging an account, you will see a “Transaction Details” pop-up.

If the customer already paid, or you are adding to the balance, the system will direct you back to the account and you can confirm on the member’s account statement that the charge is correct.
