POS Historical Sales and Save a Sale POS Functions

The View History button and feature for POS allows 2 separate functions for the user.
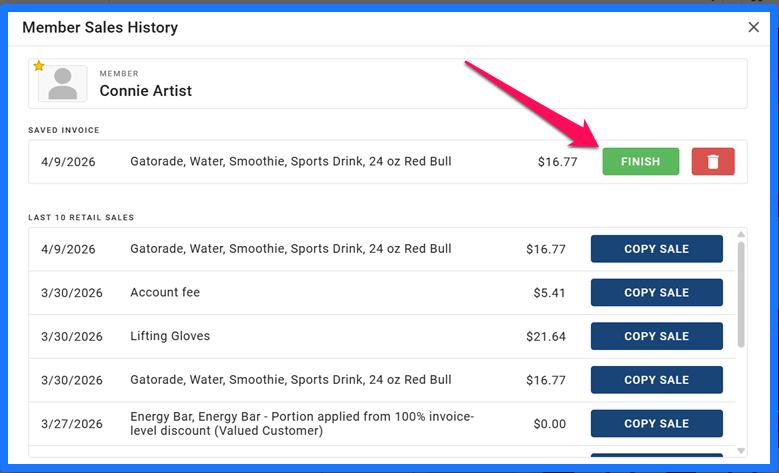
The first being the Last 10 Retail Sales, this feature grabs the last 10 purchases made by the member and allows them to be quickly re-generated for faster sales on repeat purchases.
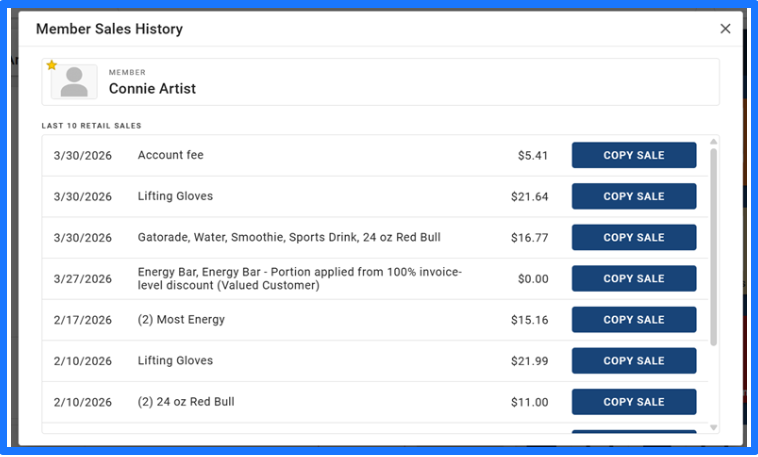
Click Copy Sale next to the sale you wish to copy.

The previous purchase will re-populate. Items that had coupons or discounts will need to be re-applied. And any item removed from the system since the sale will also be removed as its not currently available for sale.
The second function is the Saved Sale feature.
Everyone has either experienced or seen someone forget their cash and ask to be right back. With that in mind the saved sale allows for 1 sale to be saved before payment is collected per member.
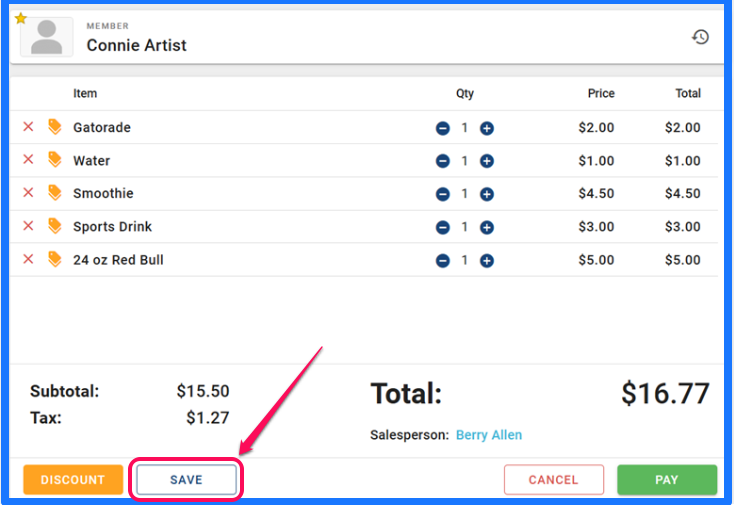
With the items in the cart hit the save button. A new window will pop up asking if you are sure you wish to save this order for later? Click Save for Later to proceed.
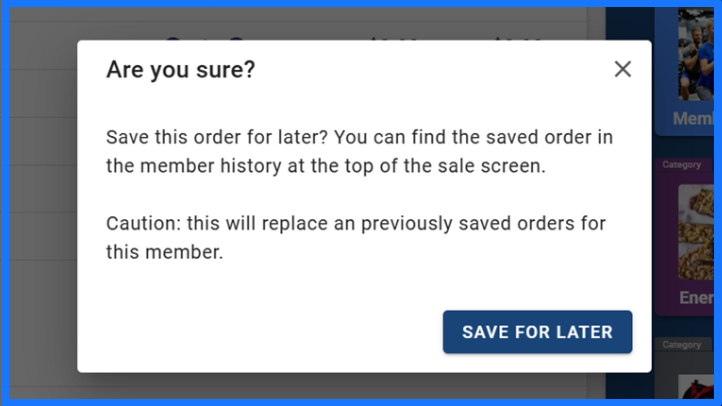
A confirmation message will appear when saved.

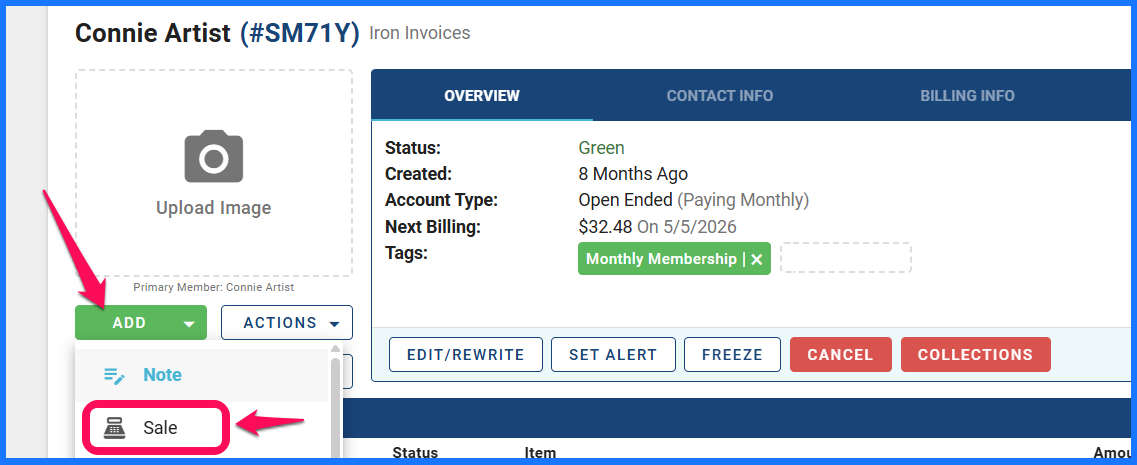
To pull the sale back up when the member is ready to complete it, pull the member up and open the POS system by adding a sale, click the Add button under the members photo, and select Sale, or Click the green Add Sale button.
Once the POS screen loads click the history button.
You will see the saved sale now present above the 10 Historical sales below. You can Delete by pressing the trash can, or click Finish to complete the Saved Invoice.
Click Finish all the items on the saved Invoice will load provided the Item is still available in the system. Coupons will need to be reapplied if they were on the initial saved sale.
Then, when ready, click Pay and collect payment type and amount.