POS- Inventory for an Item
Inventory can be found within the Point-of-Sale system.
Inventory allows owners to manage retail items inside of Gym Insight.
Please review the following articles to learn how to add items to your inventory:
Creating Custom Retail Items and Point of Sale-Setup Categories, Items.
Once your items have been created and placed into categories, let’s focus on the items that require inventory tracking.
Navigate to the POS by clicking on the Home Menu and select Settings.
Click on "Point of Sale" from the menu on the left side of the screen.
Look for the item for which inventory will be created and click the edit pencil.

This will open then "Edit Item" window.
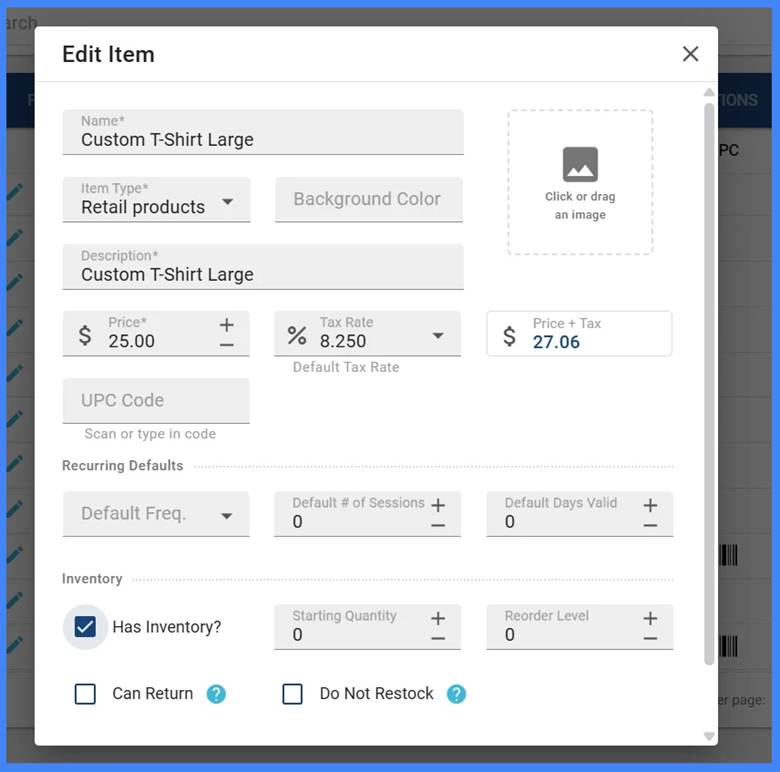
Check the "Has Inventory?" box. This will allow you to set the starting quantity count for that item. Once this is set, inventory will be updated through restock, adjustment, or removal.
It will also allow a Reorder Level to be set. The system will flag items whose inventory has reached a low level and needs to be reordered.
The Can Return option allows an item that has been refunded to either be removed from stock or not returned to inventory—for example, if the item is opened or spoiled and should not be placed back into inventory.
The Do Not Restock option is used when an item is marked to be sold out of remaining stock but will not be restocked in the future. This can be enabled after inventory has been set for items that are not selling well but will continue to be sold until depleted.
Once configured with its initial levels, click Save on the item to establish the baseline inventory based on your starting quantity.
UPDATING STOCK
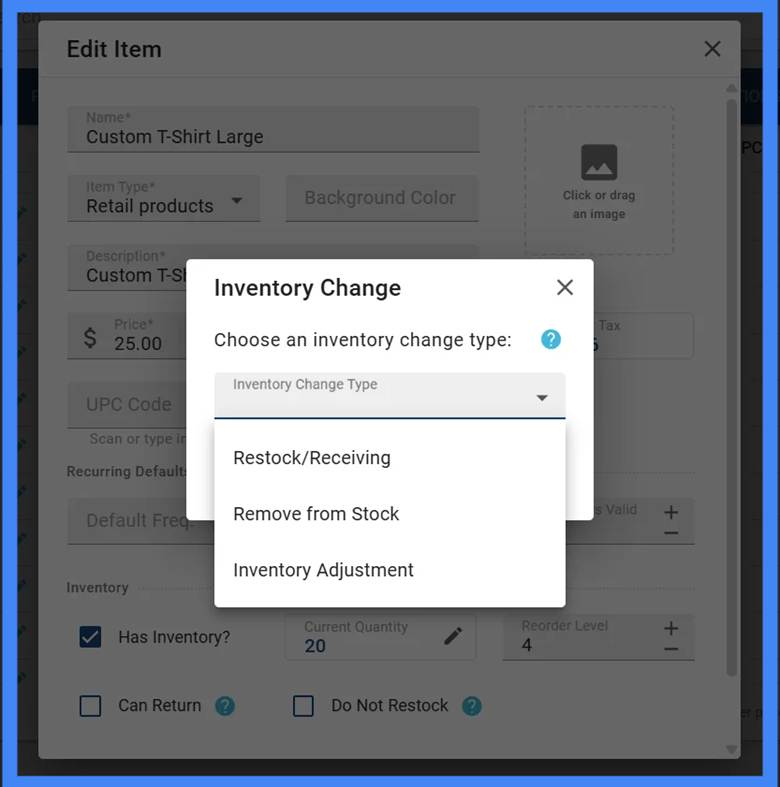
Click the pencil in the Current Quantity box.

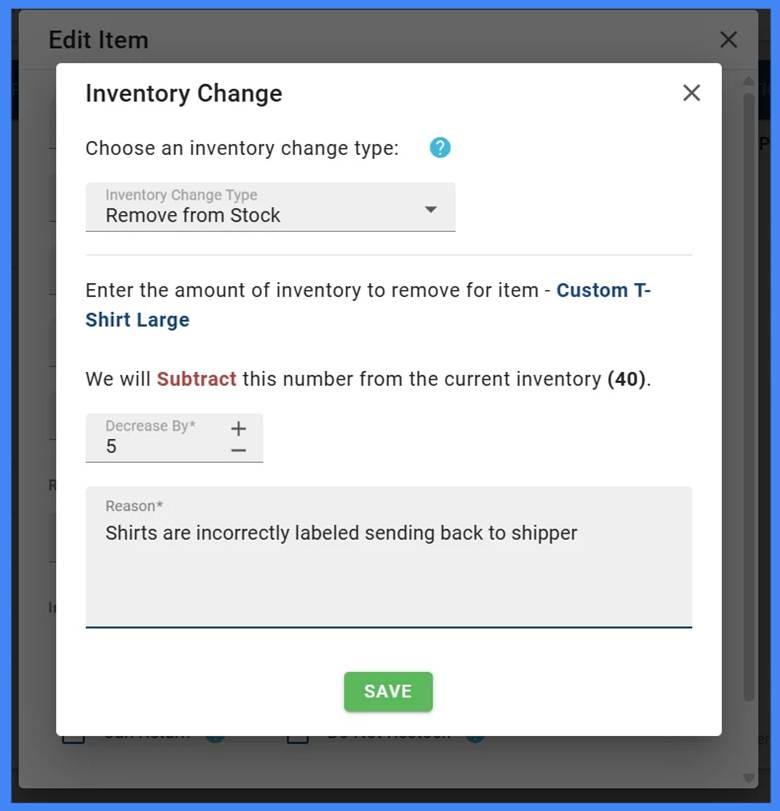
The new Inventory Change window will pop up, allowing the user to select Restock/Receiving, Remove from Stock, or Inventory Adjustment.
Select the appropriate option and click Save.
Restock/Receiving
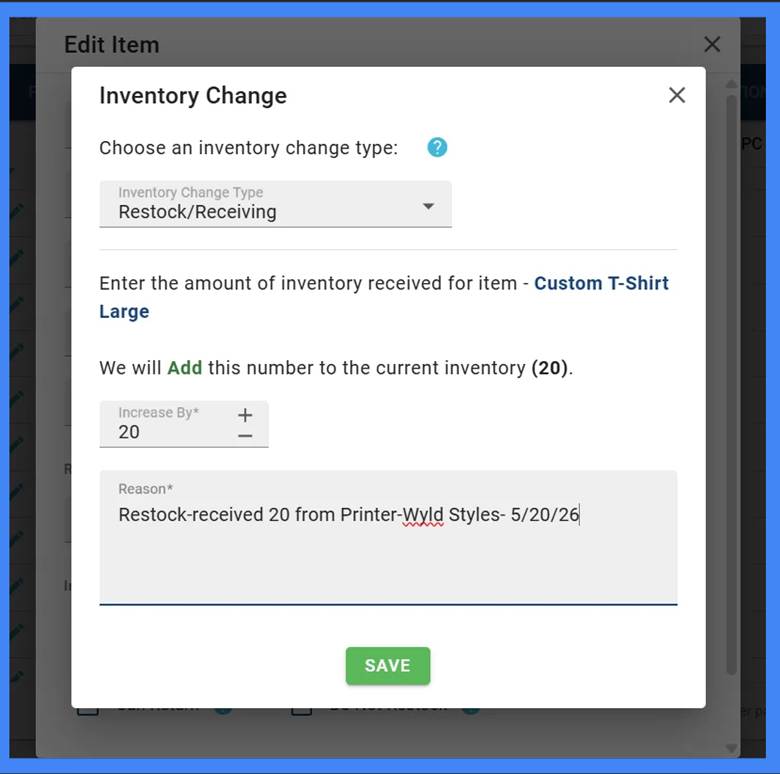
When Restock/Receiving is selected, the system will prompt you to enter the amount received along with a reason for the restock.
Once completed, click Save.
Remove from Stock
When items need to be removed from inventory, the reason can vary, but may include items that have expired and are being sent back to the shipper, items removed as promotional giveaways, or, as in this example, shirts that were incorrectly labeled and being returned to the shipper.
Once the number of units to decrease stock by is entered, enter a reason and click Save.
Inventory Adjustment
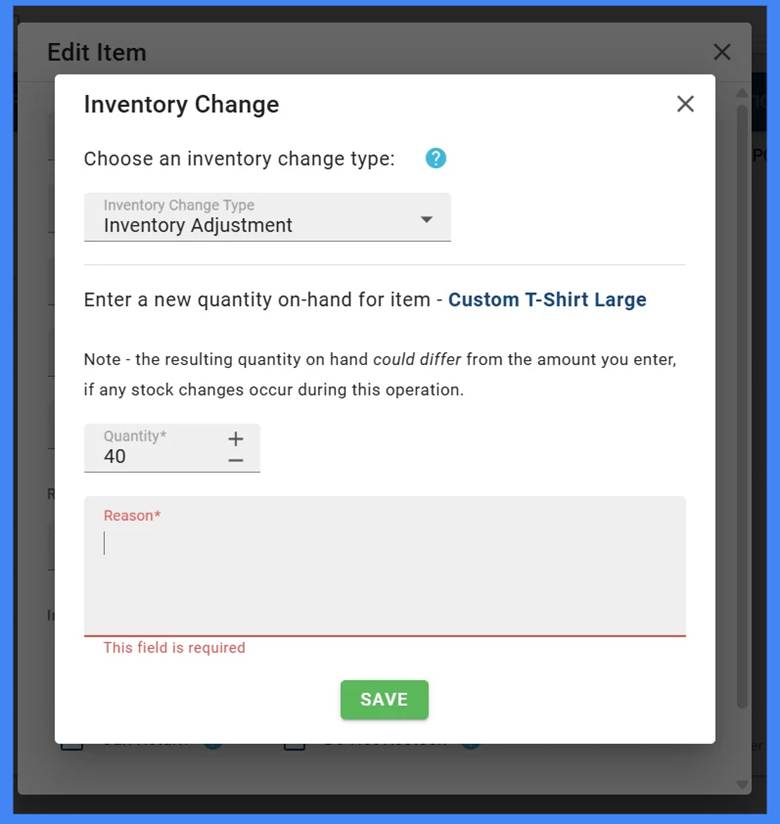
If a need to administratively adjust quantity, you would select Inventory Adjustment.
Enter the correct total on hand and provide a reason for the change. This could include performing an inventory count and finding that the current system count is incorrect, due to discrepancies identified during a physical audit or reconciliation, or because the original amount entered was incorrect and needs to be fixed.
Once complete, click Save.