POS HARDWARE -Using POS w/ Hardware
POS SYSTEM IN ACTION with Full Hardware Configuration
We are excited to show our POS System and Hardware in action.
Please enjoy this video guide. If you prefer a step-by-step format, please refer to the guide below.
Once your POS hardware is configured and the items in the system have UPCs attached, it is time to launch and implement the system. To use all the POS Hardware within Gym Insight, you must use the Google Chrome or Microsoft Edge Web Browsers. There is no support for using Safari or Mozilla Firefox. At the start of the use of a terminal it is recommended the a GM or above set the terminal for the browser. The set terminal will stay saved as long as the browser's cache is not clear or reset.

At the beginning of each day, ensure that the terminals are set to the configured computers attached to the hardware.

On the next window, follow the prompt to use the Zebra scanner, not a separate desktop scanner.
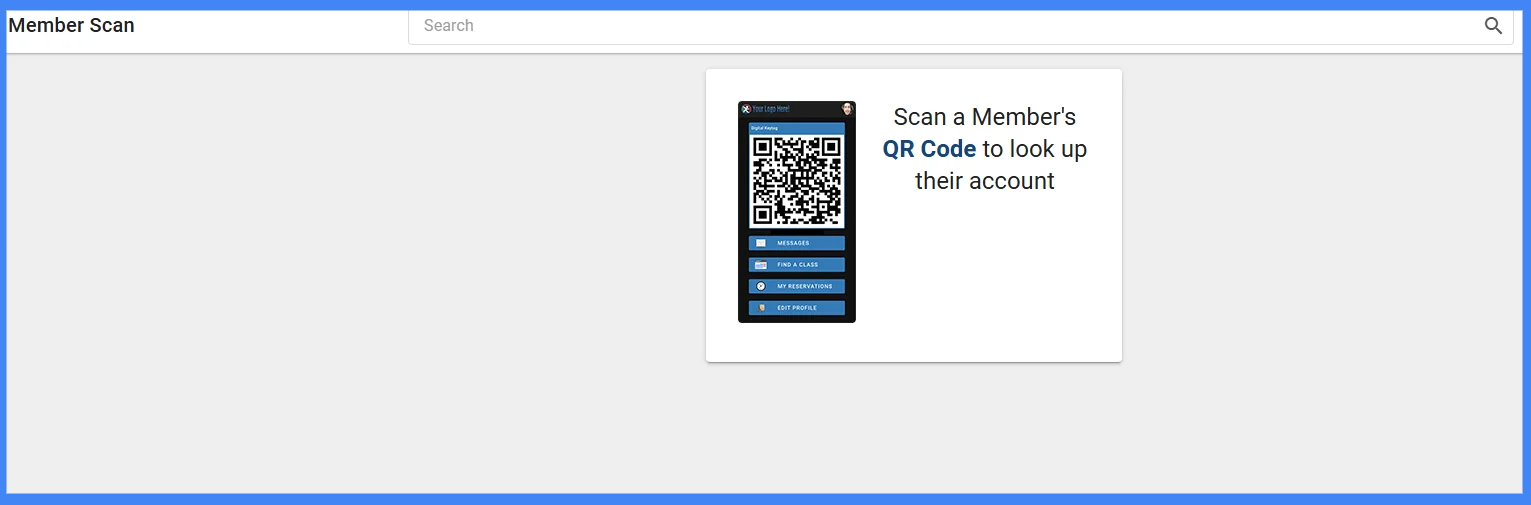
Once the member's digital key has been scanned a new screen will load letting you go to New sale for this member, the member's profile or to check in the member. Click New Sale
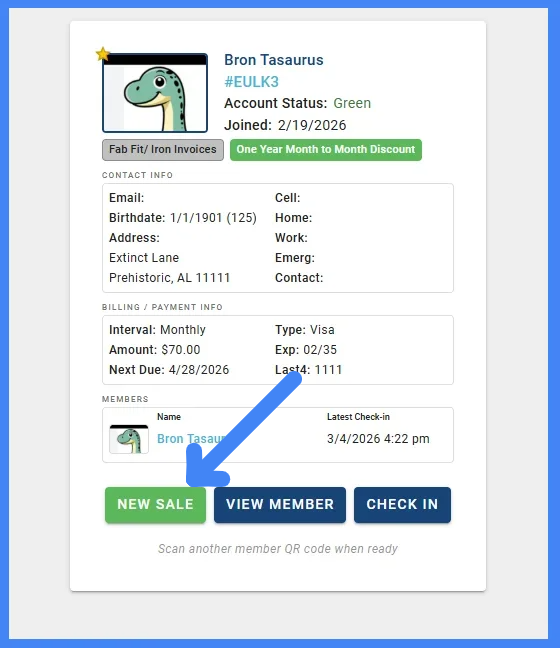
Once the member's digital key has been scanned a new screen will load letting you go to New sale for this member, the member's profile or to check in the member. Click New Sale
Here we will illustrate a POS sale using the attached hardware.

Once on the POS New Sale page, and you have the scanner configured for POS Hardware, scan the UPCs that you have previously added to the system.

Multiple UPCs can be scanned just like multiple items can be clicked on from the Categories in POS. If you scan a UPC multiple times, multiples of the item scanned will be added to the cart.
Once all items are scanned, press the Pay Button.
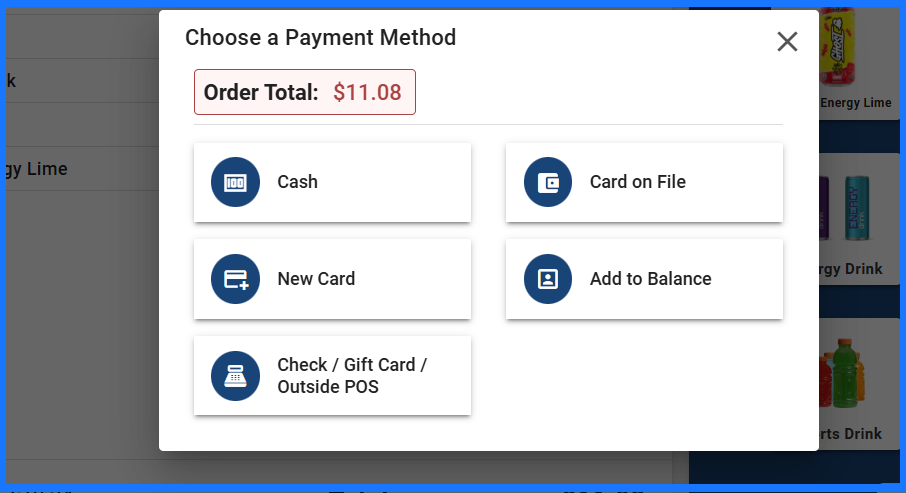
Choose a Payment Method. During checkout, you can choose whether to email/print the sales receipt.
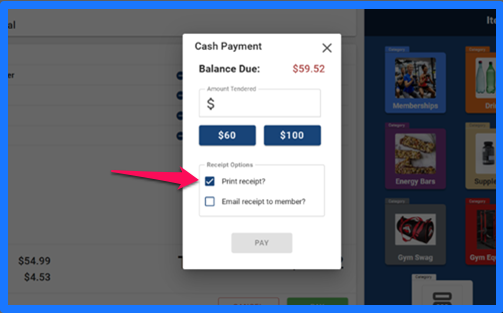
If there is change due, the system will calculate it, show the amount, alert the user that the cash drawer is open, and prompt the user to press finish to complete the transaction.
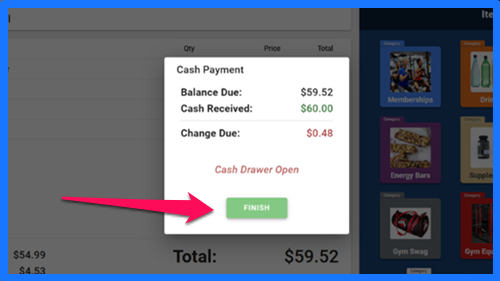
Collect the payment, distribute change, close cash drawer, provide the receipt to the customer, and press Finish to return the account screen.
Please enjoy watching this video of a scan being done and accepting a payment live.