Point of Sale-Setup Categories, add an Item to a category and UPCs to an item
Welcome to the Point Of Sale set up!
Go to your Home Menu and click on settings. Select Point Of Sale from the list on the left side.

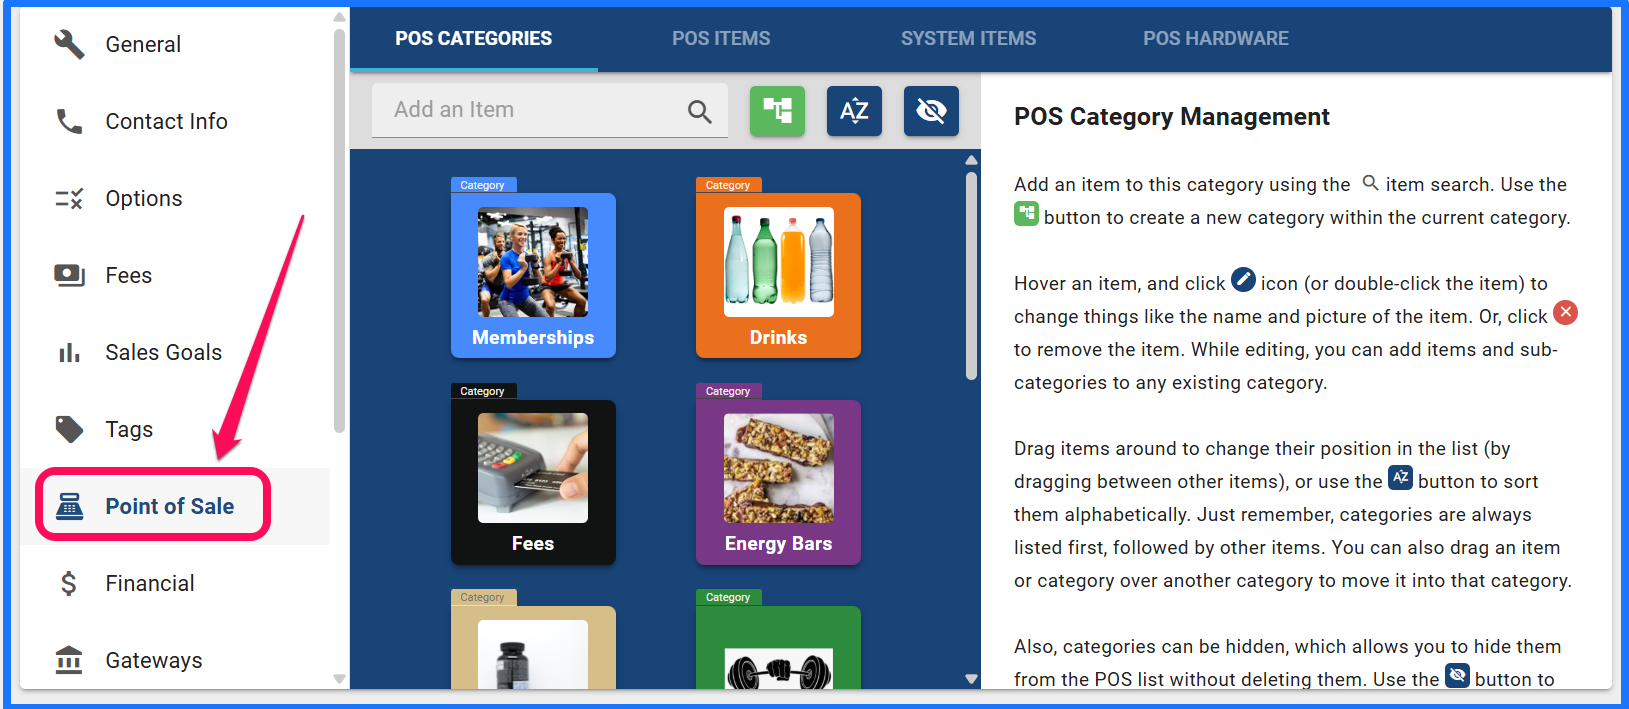
When you first open your point of sale, you will not have categories already created. You will need to follow the instructions on the right to Create Categories, Create Items, Add the items to the categories and customize how you want your Point Of Sale to look. Have fun and get creative!
- Adding a Category: Click the green button on the top of the POS categories tab and create your category title.
You can add things like, Drinks, Food, Apparel, Personal Training, Memberships, Account Fees....

1A. If you already have items created in the system, categories can be assigned from the POS Items list by clicking the blue plus button next to the item, in the categories field. This will only select categories that have already been created for assignment.

- Adding Items: Click on the edit pencil for the category you want to add to.
If you have not already added items, you can simply click on the category you want to add an item to and click create new item. If you already have items in your list, you can select the item from the list to add to the category.

Now that you have your categories and items all entered, you can order them however you like. Just drag and drop the category to the proper location.

You can also assign items that are in the system from the POS Items tab to already created categories or reassign the item to a different category. Click the small blue Plus in the Categories column next to the respect item. A pop up window will load to allow you to select the Category to add the item to.

As seen here with the example categories listed. Plan your categories and assign the items accordingly.

- Making a sale: Navigate to the member's account that wishes to make a purchase and click Add Sale. (note: you can also add sale from your quick actions on your dashboard.)

This will open your Point of Sale Screen and you can now select all the items you would like to sell to the member. You can also discount the entire invoice or just specific items as well.


Click Pay and Choose your payment method.

(You cannot do split payments)
Once you have completed the sale you can view the invoice.
See our article on Invoices for further help.
ADDING UPCS TO SALES PRODUCT
The POS does allow for products' UPCs to be loaded into the system. This allows the scanner to be used to ring up products. It is a time-saving process that is faster than using the categories and item buttons to select a product, which is also still an option. You could also assign custom barcodes, for in-house products like merchandise. To register the UPC/barcode to the system, it is required to navigate to the POS menu in the Settings area of Gym Insight. First click the Home drop-down, and select settings. Once the General Settings page loads, please select the POS option, which is located on the left side of the screen.
To add the UPC to an Item, either during item creation (KB Article 1) or by editing the item later, as illustrated in the above image. While you can hand enter the UPC field, you can also use the scanner to scan the UPC into the field with the Edit Item screen open for the Item you wish to add a UPC to.
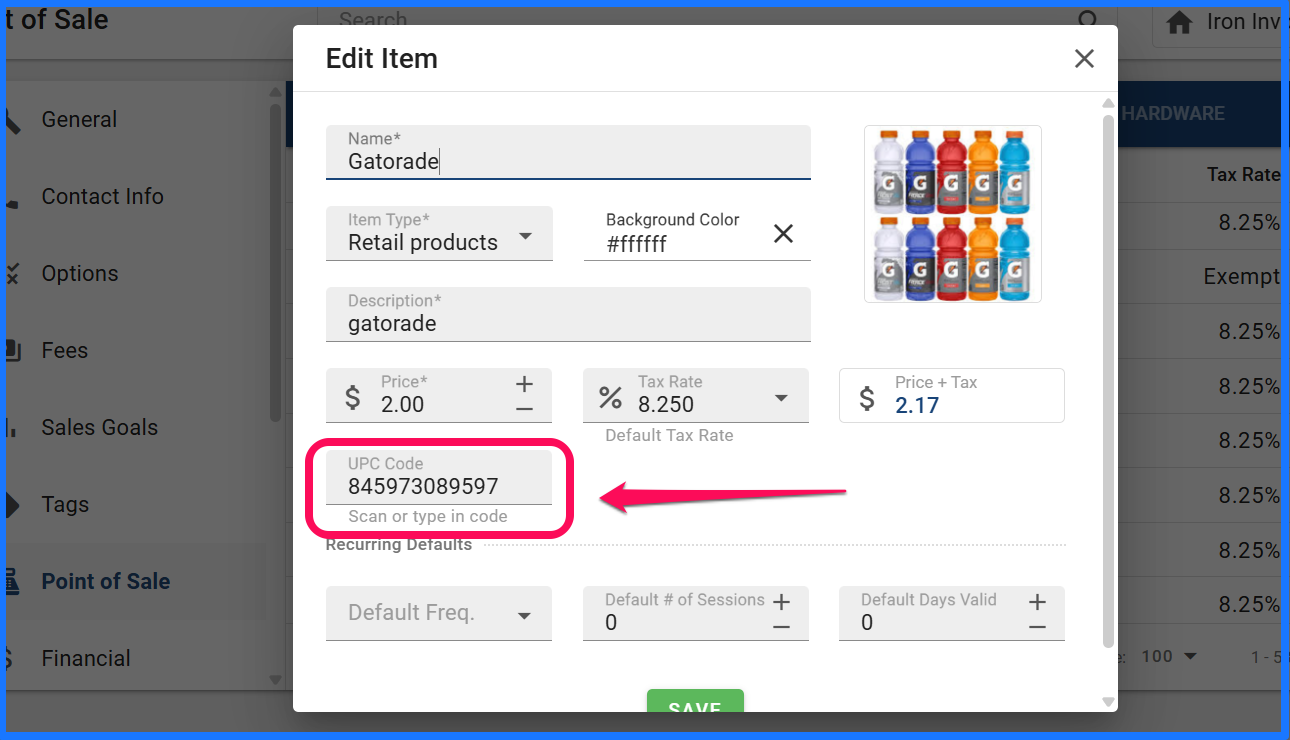
Once a UPC is associated with an item, it will be reflected on the POS Items screen, under the UPC column as seen above (see the Barcode present in the UPC column).